

by Mel @troubleon8wheels
I get a lot of compliments about the royal blue colour of my Jack boots. It's not a custom colour that Moxi do - I left the M in the backstay the original teal, because I thought it looked cute, and by the time I got there I didn't have the patience to sit and paint it carefully! Once people know that their suede skates can change colour, a little light bulb moment happens...
I'm no stranger to a getting my hands dirty. There is a certain satisfaction knowing that the project you've done is something you have had a major hand in. Of course, when it comes to pricey skates, it's also good to know that things will mostly go right.
Customising your skates is that kind of project. I've seen some amazingly creative designs all over the internet and in real life, and it's the kind of project that won't render your skates entirely useless if it goes a bit wrong. After all, they will still roll.
Remember that the starting colour of your skates will affect the final colour. If you have honeydew coloured skates and want to add pink, they may go brown... But pineapple + bright pink = bright orange. Or it should - consult a colour mix chart in advance if you need to brush up.
If you have a light colour of suede, it will be easy to change the colour after a few years, or when you think they look a bit too scruffy. Darker colours could go an even richer deep colour, or black.
What you need:
Chosen colour of suede dye
Your skates
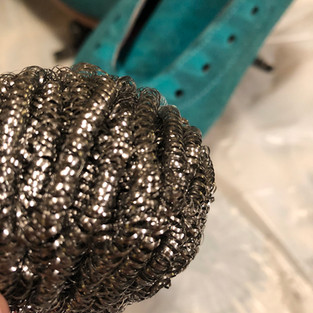
Metal scourer or similar to clean skates
Newspaper to protect your surfaces
Kitchen roll to wipe those spills up instantly
A small paint brush for fiddly areas
Also prepare somewhere for your skates to dry if the place you are working is not convenient to leave them.
Suede protector spray
Gloves / old clothes
Preparation is key.
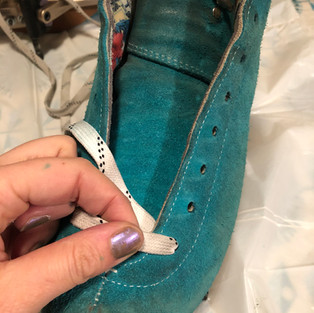
Start by removing the wheels and laces and giving them a quick buff to remove any protective spray or dirt layer that may prevent the dye from penetrating. You want the suede fibres to stand up and be nice and fluffy. I use a clean metal scourer for this, although there are suede cleaning bushes too, if the suede is really shiny looking. Gentle circular motions generally works well.


When you are satisfied most of the dirt has been removed, use masking tape to cover around the sole of the boot and protect your workspace. The suede dye is very runny and watery, so it is easy to drip it.
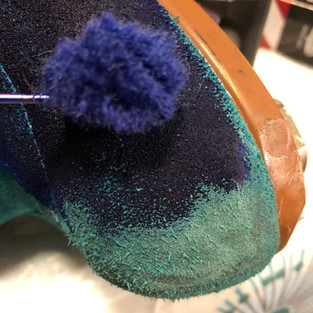
The brand that is recommended is Angelus suede dye, although other dyes do exist. I found that one bottle is not quite enough to get really even coverage, so I usually get two bottles. This also means I have dye left for touch ups (every six months or so) if required. The applicator has a sponge tip, which holds the dye well and you'll find yourself starting slowly and then liberally slapping it on. The initial coverage is very satisfying! The dye kind of spreads out and soaks in. I use a small brush for fiddly areas. If you get dye somewhere it shouldn't be, wipe it off as quickly as possible as it will stain.

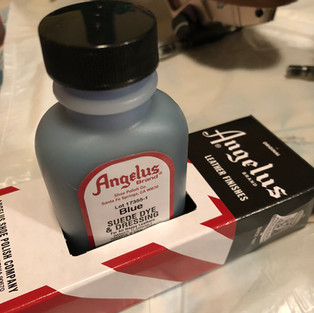


The box usefully serves as a holder for the dye bottle - I'd recommend using it, as knocking a bottle of dye is not a good idea!
Fiddly bits - Around the eyelets is tricky. Either switch to a brush here to try and get in all the gaps, or just go for it. The eyelet hardware may slightly take on a paler hue of your dye, but once you have finished it will be barely noticeable. If it worries you, keep that kitchen roll handy and wipe the hardware as you go. The tongue is also pretty tricky. I inverted by skate and pulled the tongue out as far as possible. You won't see the very edges where the tongue is joined to the main skate, but I wanted to get as much dye into the crease as possible. It may be quite a cool look to leave the tongue the original colour, or put masking tape patterns on and see what happens when it peels off?


I didn't use gloves... and had blue finger tips for days! I also left my skates to dry between coats of suede dye. It will dry slightly lighter compared to when it is first applied. Allowing each coat to dry properly helped me spot any patchy sections that needed more attention. In total I used two coats on most of the skate and touched up a third time where necessary.
Once my skates were totally dry and I was happy with the colour, I used a sealant to spray the dye and lock the colour in place as much as possible. The dye WILL transfer to clothes / laces / your new bag (if you use a skate leash to carry your skates around over your shoulder beware!) . I didn't seal the colour the first time I dyed skates, and wondered why my laces changed colour, and what that weird mark was on my back... Using a sealant will minimise this - anything available at your local hardware shop will work just fine. Be generous with this, again a couple of coats and leave it to dry between coats.
It means the whole process of colouring skates can take a couple of days.


Finally, pop the wheels back on, re-lace, and you're good to roll! It will look like you have super fresh skates, and even better absolutely zero break in time! Yay!

If you want to watch the process, Roller Goolie does a really great tutorial about dyeing skates on her YouTube. Find it here.
Thank you for reading, and tag @roller_girl_gang in your pictures if you get creative.
Mel xoxo